> ## Documentation Index
> Fetch the complete documentation index at: https://docs.filecheck.io/docs/llms.txt
> Use this file to discover all available pages before exploring further.
# Create a Rule
> A Rule is the intake gate — what customers may upload, how many files, and how each file is checked while they wait.
A **Rule** is the customer-facing **intake gate**. It describes what a customer is allowed to upload for a given product, drop-zone, or API endpoint, and decides — *synchronously, while the customer waits* — whether each file is accepted, accepted with warnings, or rejected.
A Rule covers exactly four things: **cardinality** (how many files), **acceptance** (which file types), **preflight** (the check to run per type), and **onFail** (what to do when a check fails). It does not describe what happens after acceptance — fixing, optimizing, merging, exporting all belong to the [Workflow](/configuration/workflows). Rules live in **Library → Upload Rules**.
 ## Create one
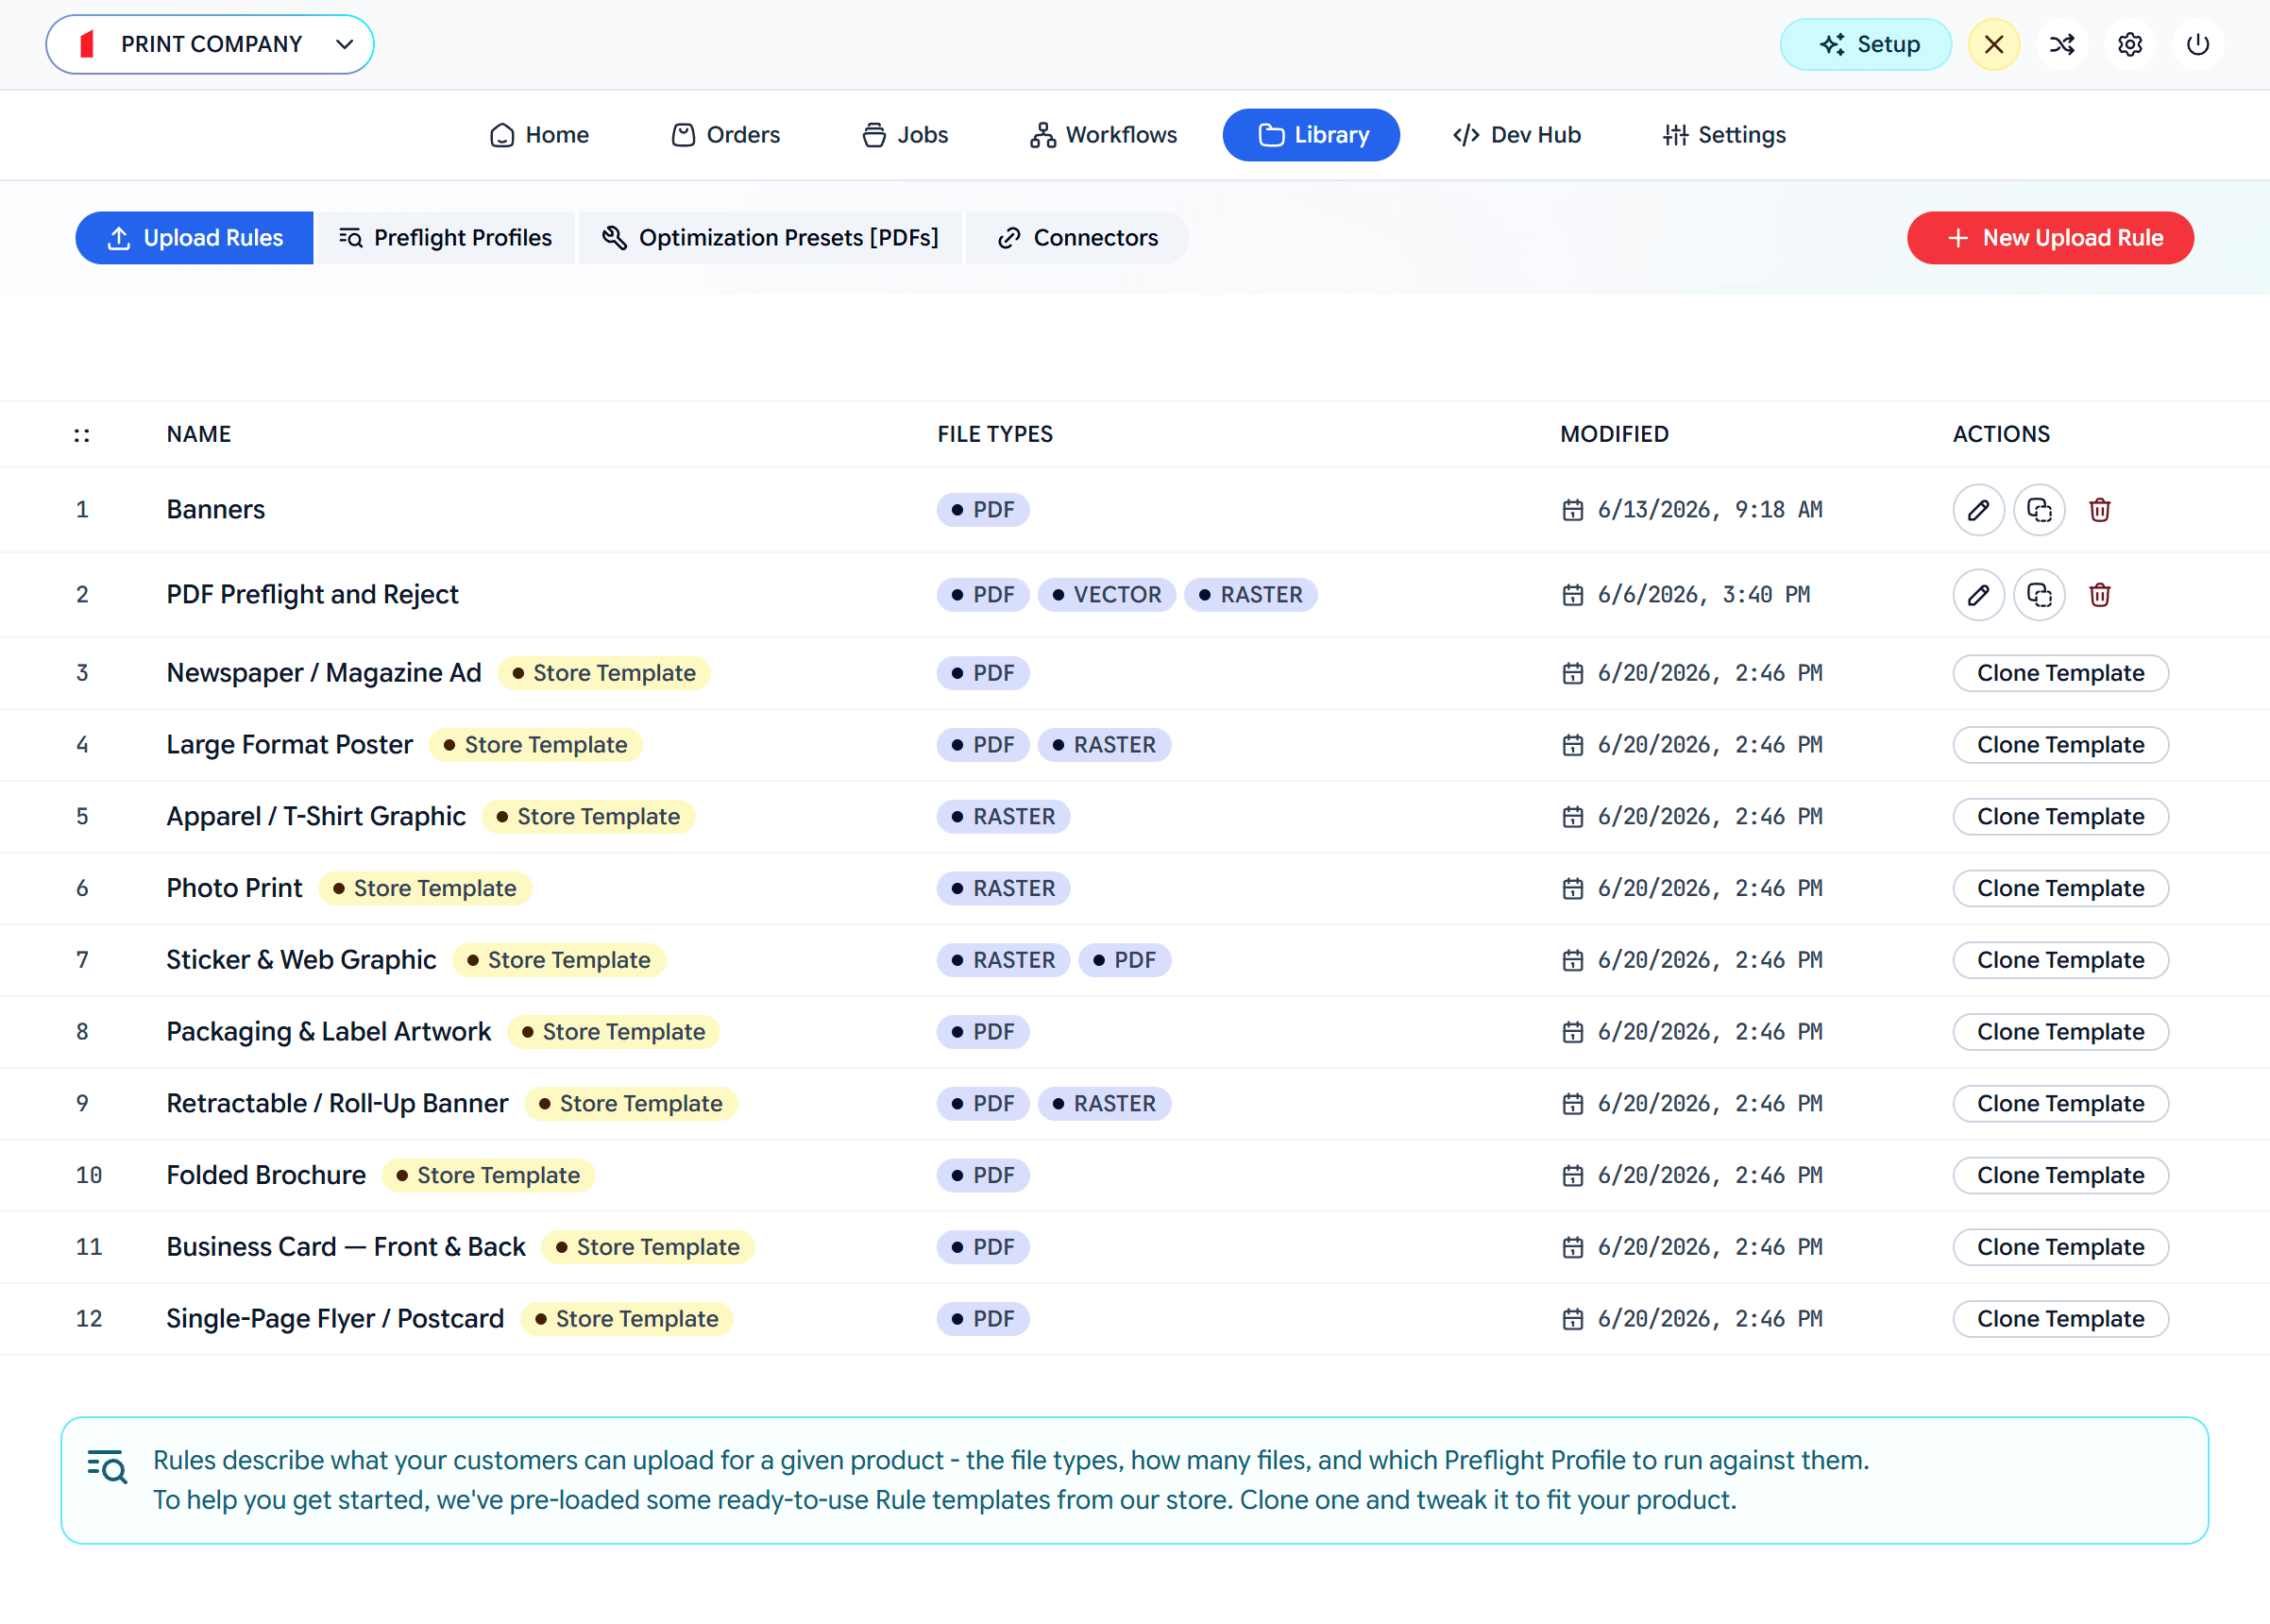
Go to **Library → Upload Rules**. Clone a **template** that's close to your product, or click **New Upload Rule**.
Give the rule a clear **title**. The optional **upload instructions** are shown to customers in the upload area.
Choose how many files the customer must provide (below).
Add each file type you accept, with an optional max size and an optional check (below).
Click **Save**. The rule can now be assigned to a Workflow.
## Create one
Go to **Library → Upload Rules**. Clone a **template** that's close to your product, or click **New Upload Rule**.
Give the rule a clear **title**. The optional **upload instructions** are shown to customers in the upload area.
Choose how many files the customer must provide (below).
Add each file type you accept, with an optional max size and an optional check (below).
Click **Save**. The rule can now be assigned to a Workflow.
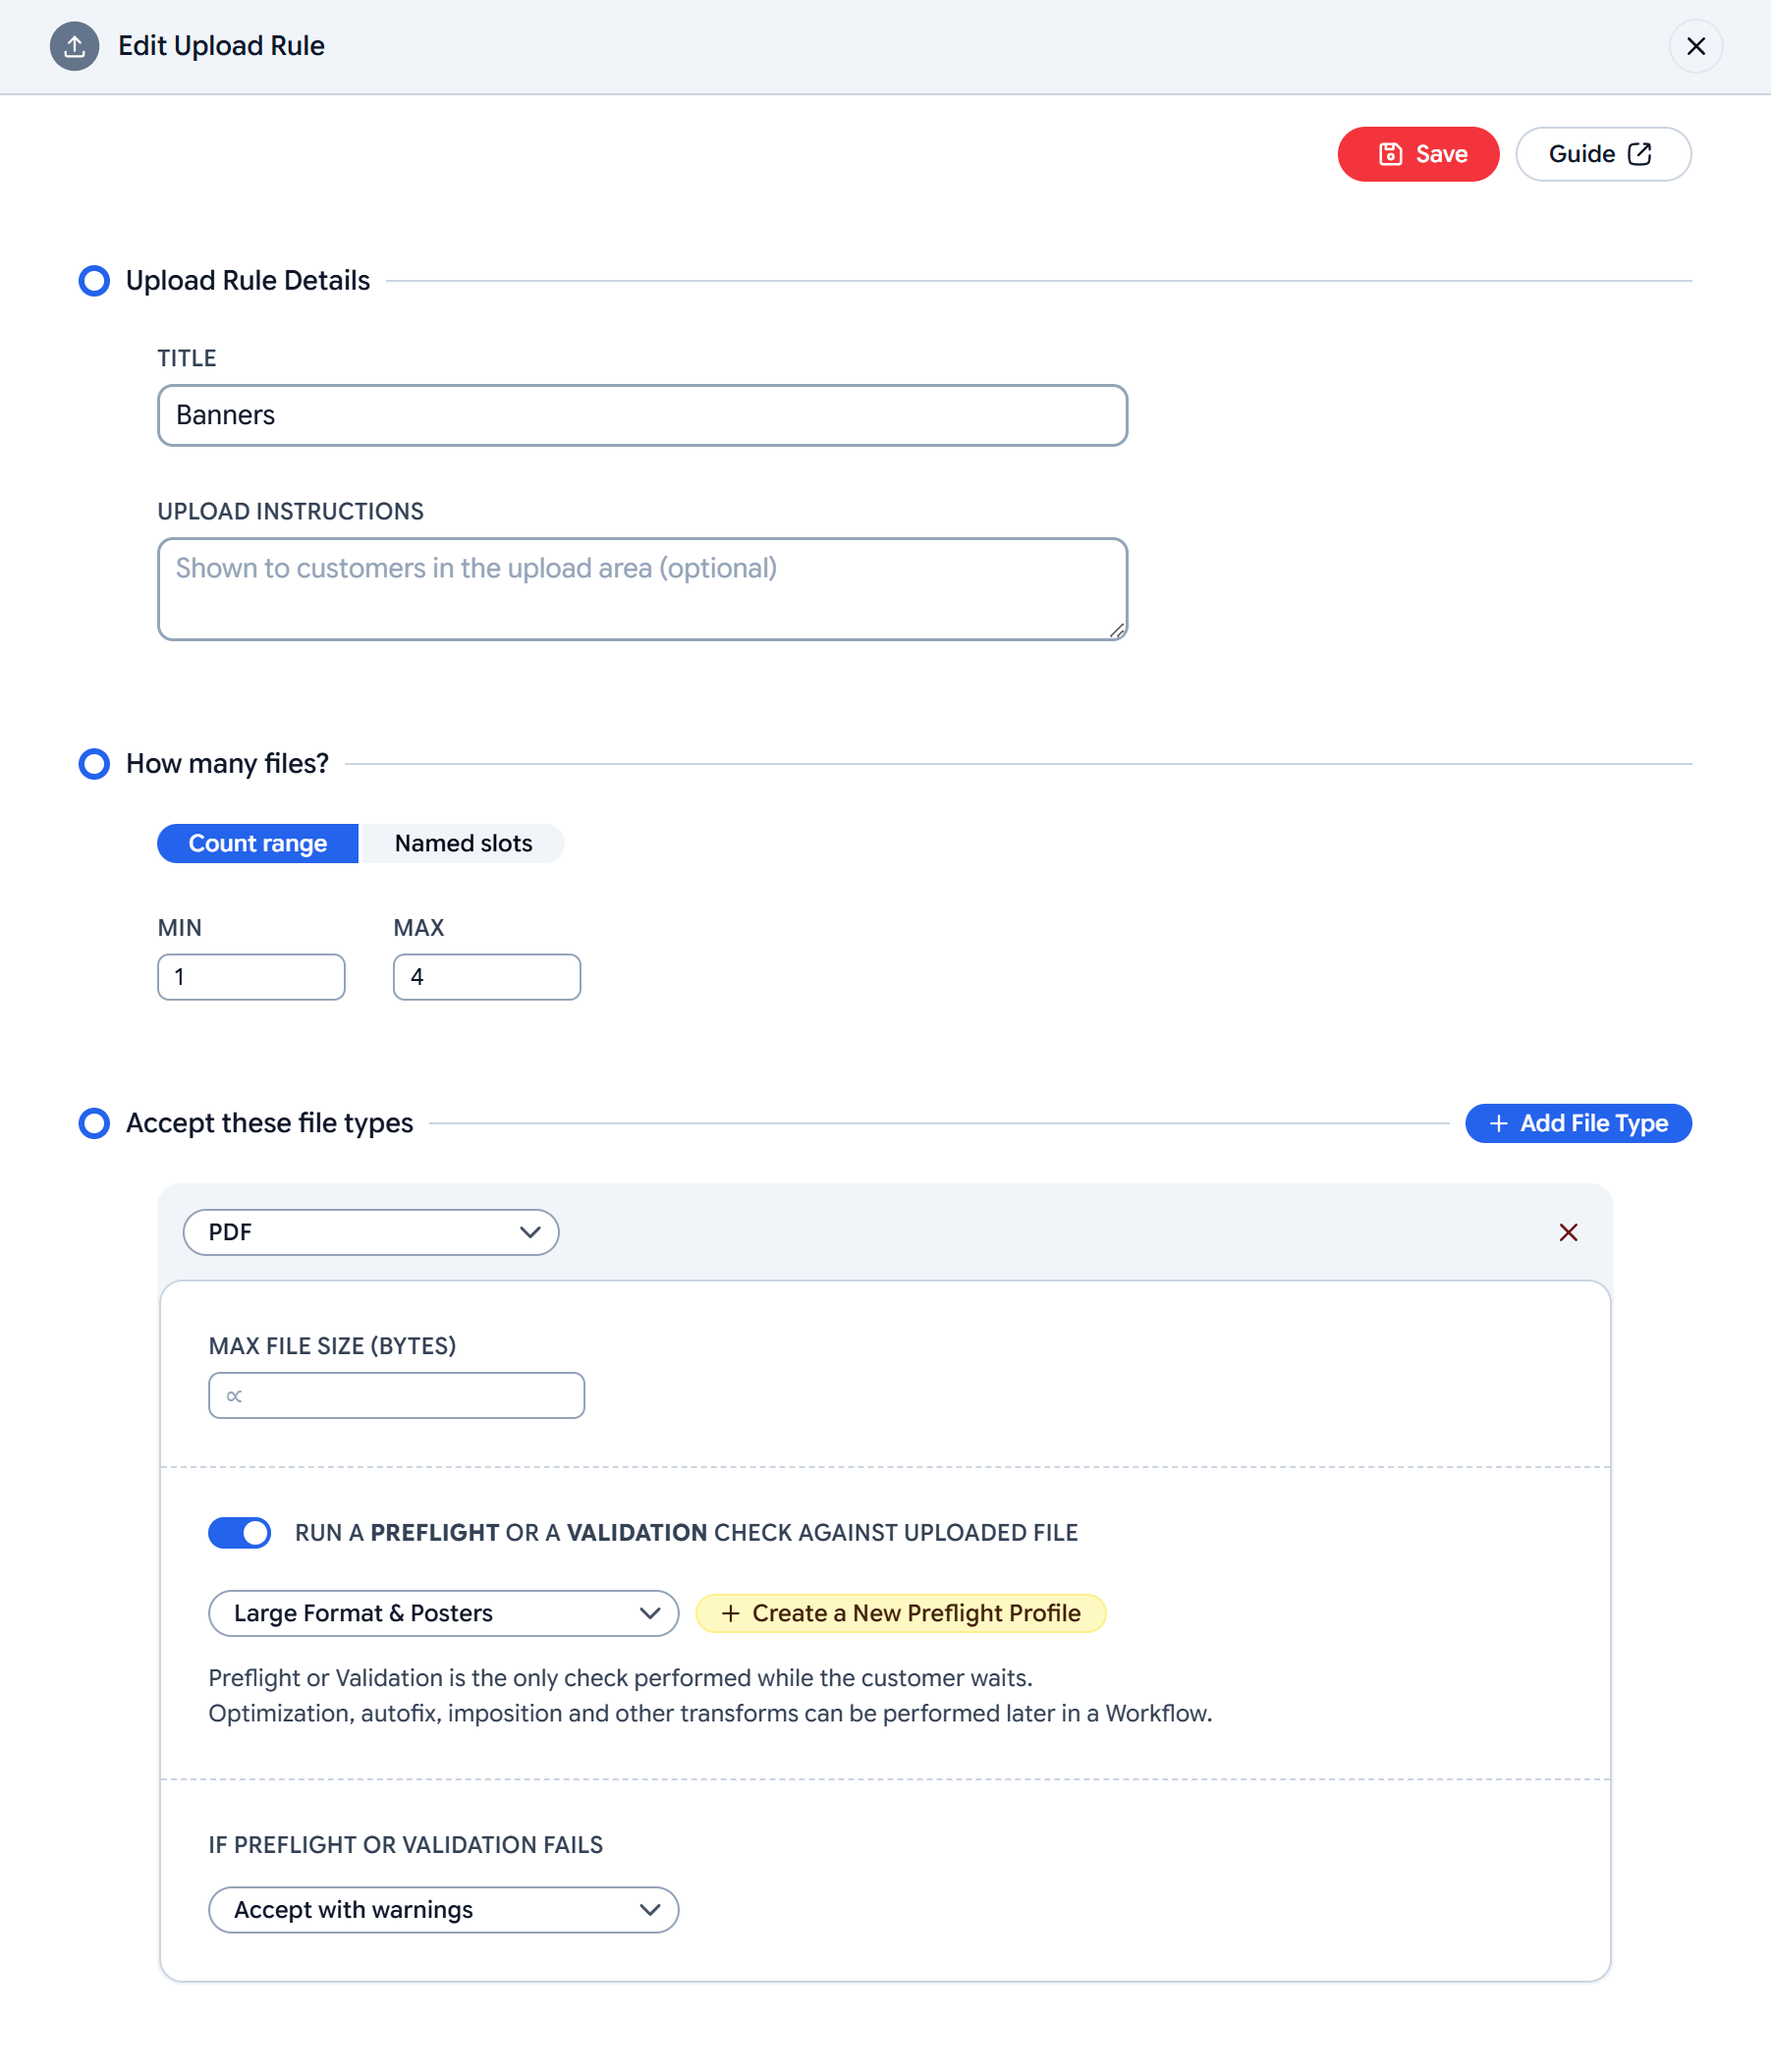 ## Cardinality: how many files
**Cardinality** is how many files the rule requires and allows. Two modes:
A **MIN** and **MAX** — for example 1–1 for a single artwork, or 1–4 to allow up to four. The customer must provide at least MIN before the job can proceed.
A defined role per file — for example *Front* and *Back* for a double-sided card. Each slot is its own labelled drop target.
## Accepted file types
Click **Add File Type** for each type you accept (PDF, PNG, JPG…), and optionally set a **max file size**. For each type you can decide whether — and how — to check the file.
### Preflight or validation
Toggle **Run a preflight or a validation check against uploaded file**, then pick what runs. This is the only check performed while the customer waits, so it stays fast; heavier transforms happen later in the Workflow.
Choose a [Preflight Profile](/configuration/preflight) — a **PDF** type lists PDF profiles, a raster type lists Raster profiles. The file is checked against that profile's checks.
Choose a conformance standard instead — **PDF/A** (1a–4f) or **PDF/UA** (accessibility). The file is validated for conformance rather than checked against your custom profile.
Preflight and validation are mutually exclusive per file type — you pick one. Only PDF and raster types can be checked; other types (vector, office) are converted to PDF at intake and processed downstream.
### If the check fails
Set the **onFail** policy per file type:
| Policy | Result |
| ------------------------ | ---------------------------------------------------------------- |
| **Reject** | The file is blocked; the customer can't proceed until it passes. |
| **Accept with warnings** | The file proceeds, flagged with warnings. |
| **Manual review** | The file is held for an admin to review before it proceeds. |
This policy is what Filecheck collapses into the `canProceed` flag your store reads. See [Jobs](/concepts/jobs).
Assign the rule at a workflow's intake stage and define the processing that follows.
## Cardinality: how many files
**Cardinality** is how many files the rule requires and allows. Two modes:
A **MIN** and **MAX** — for example 1–1 for a single artwork, or 1–4 to allow up to four. The customer must provide at least MIN before the job can proceed.
A defined role per file — for example *Front* and *Back* for a double-sided card. Each slot is its own labelled drop target.
## Accepted file types
Click **Add File Type** for each type you accept (PDF, PNG, JPG…), and optionally set a **max file size**. For each type you can decide whether — and how — to check the file.
### Preflight or validation
Toggle **Run a preflight or a validation check against uploaded file**, then pick what runs. This is the only check performed while the customer waits, so it stays fast; heavier transforms happen later in the Workflow.
Choose a [Preflight Profile](/configuration/preflight) — a **PDF** type lists PDF profiles, a raster type lists Raster profiles. The file is checked against that profile's checks.
Choose a conformance standard instead — **PDF/A** (1a–4f) or **PDF/UA** (accessibility). The file is validated for conformance rather than checked against your custom profile.
Preflight and validation are mutually exclusive per file type — you pick one. Only PDF and raster types can be checked; other types (vector, office) are converted to PDF at intake and processed downstream.
### If the check fails
Set the **onFail** policy per file type:
| Policy | Result |
| ------------------------ | ---------------------------------------------------------------- |
| **Reject** | The file is blocked; the customer can't proceed until it passes. |
| **Accept with warnings** | The file proceeds, flagged with warnings. |
| **Manual review** | The file is held for an admin to review before it proceeds. |
This policy is what Filecheck collapses into the `canProceed` flag your store reads. See [Jobs](/concepts/jobs).
Assign the rule at a workflow's intake stage and define the processing that follows.