

Odoo 18 on the Apps Store
The official listing for Odoo 18. Free, LGPL-3.
Odoo 17 on the Apps Store
The official listing for Odoo 17. Free, LGPL-3.
Odoo Online (the SaaS at odoo.com) cannot install third-party modules. Use a self-hosted Odoo or Odoo.sh.
1
Install the module
Download the module for your Odoo version from the Odoo Apps Store (Odoo 18 or Odoo 17) and extract the
filecheck folder into your addons path. On Odoo.sh, add the GitHub repository as a submodule on the branch that matches your Odoo version (18.0 or 17.0).Restart Odoo, open Apps, click Update Apps List, search for Filecheck (remove the default Apps filter if it does not show), and click Activate on Filecheck Print File Preflight. It installs Odoo’s eCommerce app too if you do not have it yet.2
Add your keys
Go to Website → Configuration → Settings and scroll to the Filecheck section. Enter your publishable key and secret key from the Dev Hub, click Save, then click Test connection and sync workflows. Your workflows and connectors load into the dropdowns. Pick a Default Workflow and save.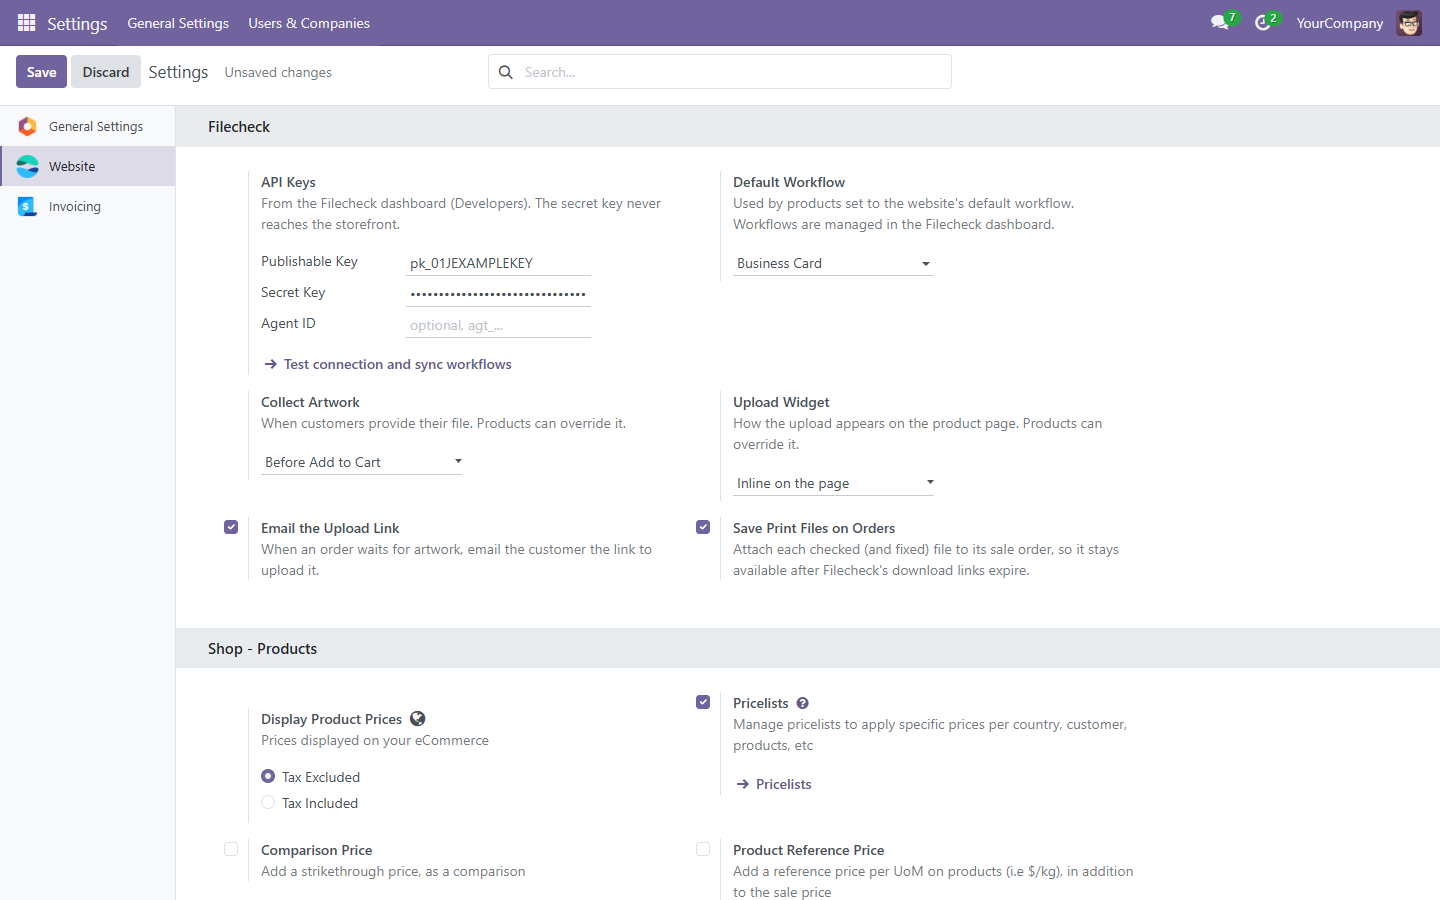
3
Enable Filecheck on a product
Open a product and go to its Filecheck tab. Set Filecheck to Website’s default workflow, or choose A specific workflow and pick it. Products are off until you switch them on. Optionally set Collect Artwork, the Upload widget (inline or a button that opens a dialog) and a Connector.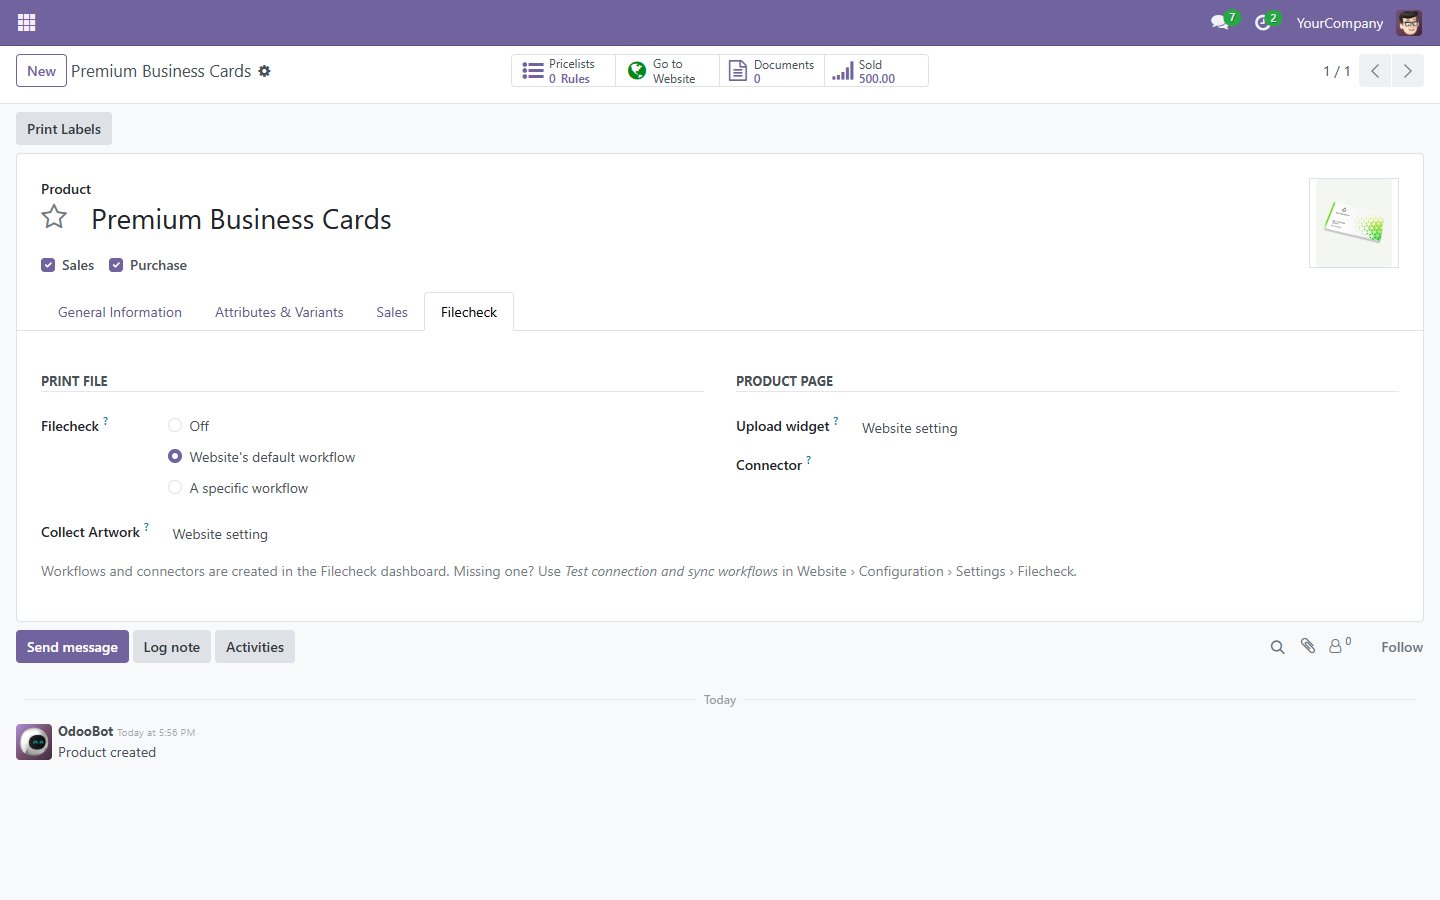
4
Test the gate
Open the product page. The upload sits above Add to cart, which stays disabled until the file passes. Upload a test file, add the product to the cart and check out. The cart line shows the file name, and each uploaded file gets a cart line of its own.
5
Find the files on the order
When the order is confirmed, it is sent to Filecheck. Open the sale order and go to its Filecheck tab: each line shows its outcome, proofs and download links, with View on Filecheck to open the job. Once the job has finished, its files are attached to the order, with a note in the chatter.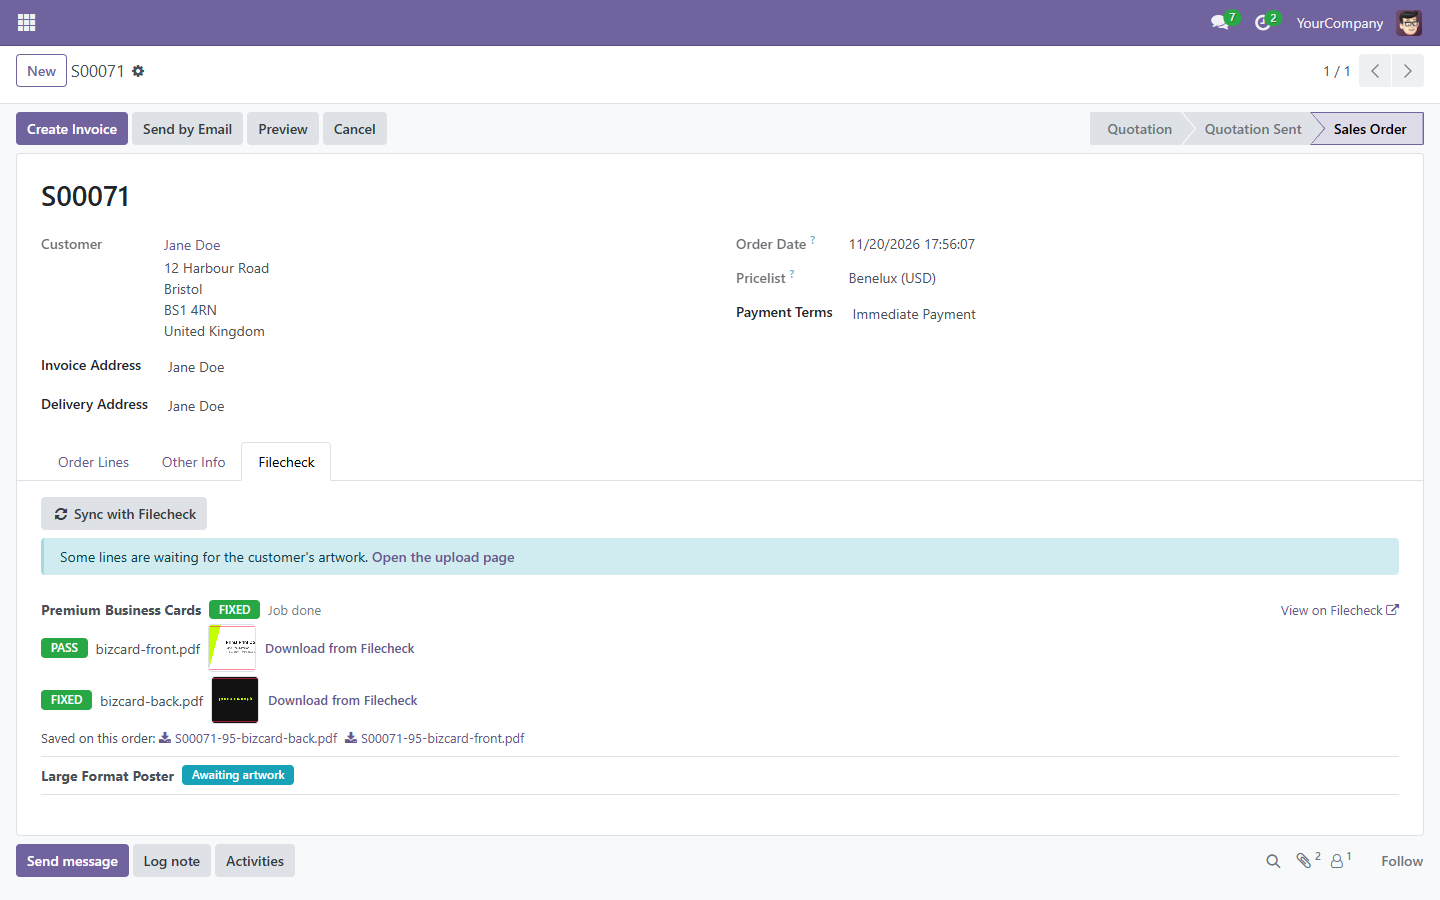
Artwork after checkout
The module lets customers pay first and upload their artwork later, on your own upload page. See Artwork after checkout for the whole feature.1
Set up your upload page
In Filecheck, go to Settings → Artwork after checkout, set an Upload Page Address, and add your logo and colours.
2
Choose when to collect artwork
In the Filecheck section of the website settings, set Collect Artwork for the whole store: Before Add to Cart (at checkout), Before or after checkout (optional, or after checkout) or After checkout (after checkout only). To change one product, use Collect Artwork on the product’s Filecheck tab. The module’s setting decides both the product page and which order lines wait for artwork.
3
Choose how customers get the link
The link shows on the order confirmation page and on the customer’s order page in their portal. With Email the Upload Link on, customers also get one Upload your artwork email when the order is confirmed. Edit its wording in the Filecheck: Upload your artwork email template.
Only confirmed sales orders get an upload page: quotations and cancelled orders never do. If the upload cannot run on the product page (for example when Filecheck cannot be reached), the customer can still order. That line then waits for artwork after checkout, and the customer gets the upload link, whatever the product’s setting.